hello and welcome...

Hello and welcome to my blog, where I love to share a little of my life with you...I am so lucky to be a textile artist and maker...inspired by the beautiful countryside around me and by all sorts of things in my life....if you fancy a creative WORKSHOP take a look here or taking a peep at what's in my ETSY shop click here...thank you for paying me a visit today!


Showing posts with label machine embroidery. Show all posts

Tuesday, 19 November 2013

stitching texture...

as you will have gathered by now my dear patient readers I spend as much time as possible sewing, stitching, machine embroidering, creating, playing with fabrics and generally having a wonderful time...(housework what housework?!).. even better is teaching a machine embroidery Workshop and I thought I'd just share a little of what we covered at a recent one...looking at creating a textured surface...


I had 4 lovely and very creative souls with me, interestingly the Universe had kindly organised they were all students...one doing GCSE, two at A'level and one doing an Open COllege of Arts Textile course...amazing synchronicity!

as usual the immaculate studio prepared for my workshopees quickly bcomes a creative brouhaha...what a great word that is, no idea what it means but it seems to fit!


dear old bondaweb (ahem there are probably lots of other kinds of fusible fabric out there Ed)...that versatile "heat reactive, sheet of glue which permanently bonds one fabric to another when ironed"...aha but did you know it's really fun when you paint it? with watercolour, or acrylic or maybe fabric paint...


and then you can literally glue on texture by ironing on snippets of thread or fabric, then just add stitching...


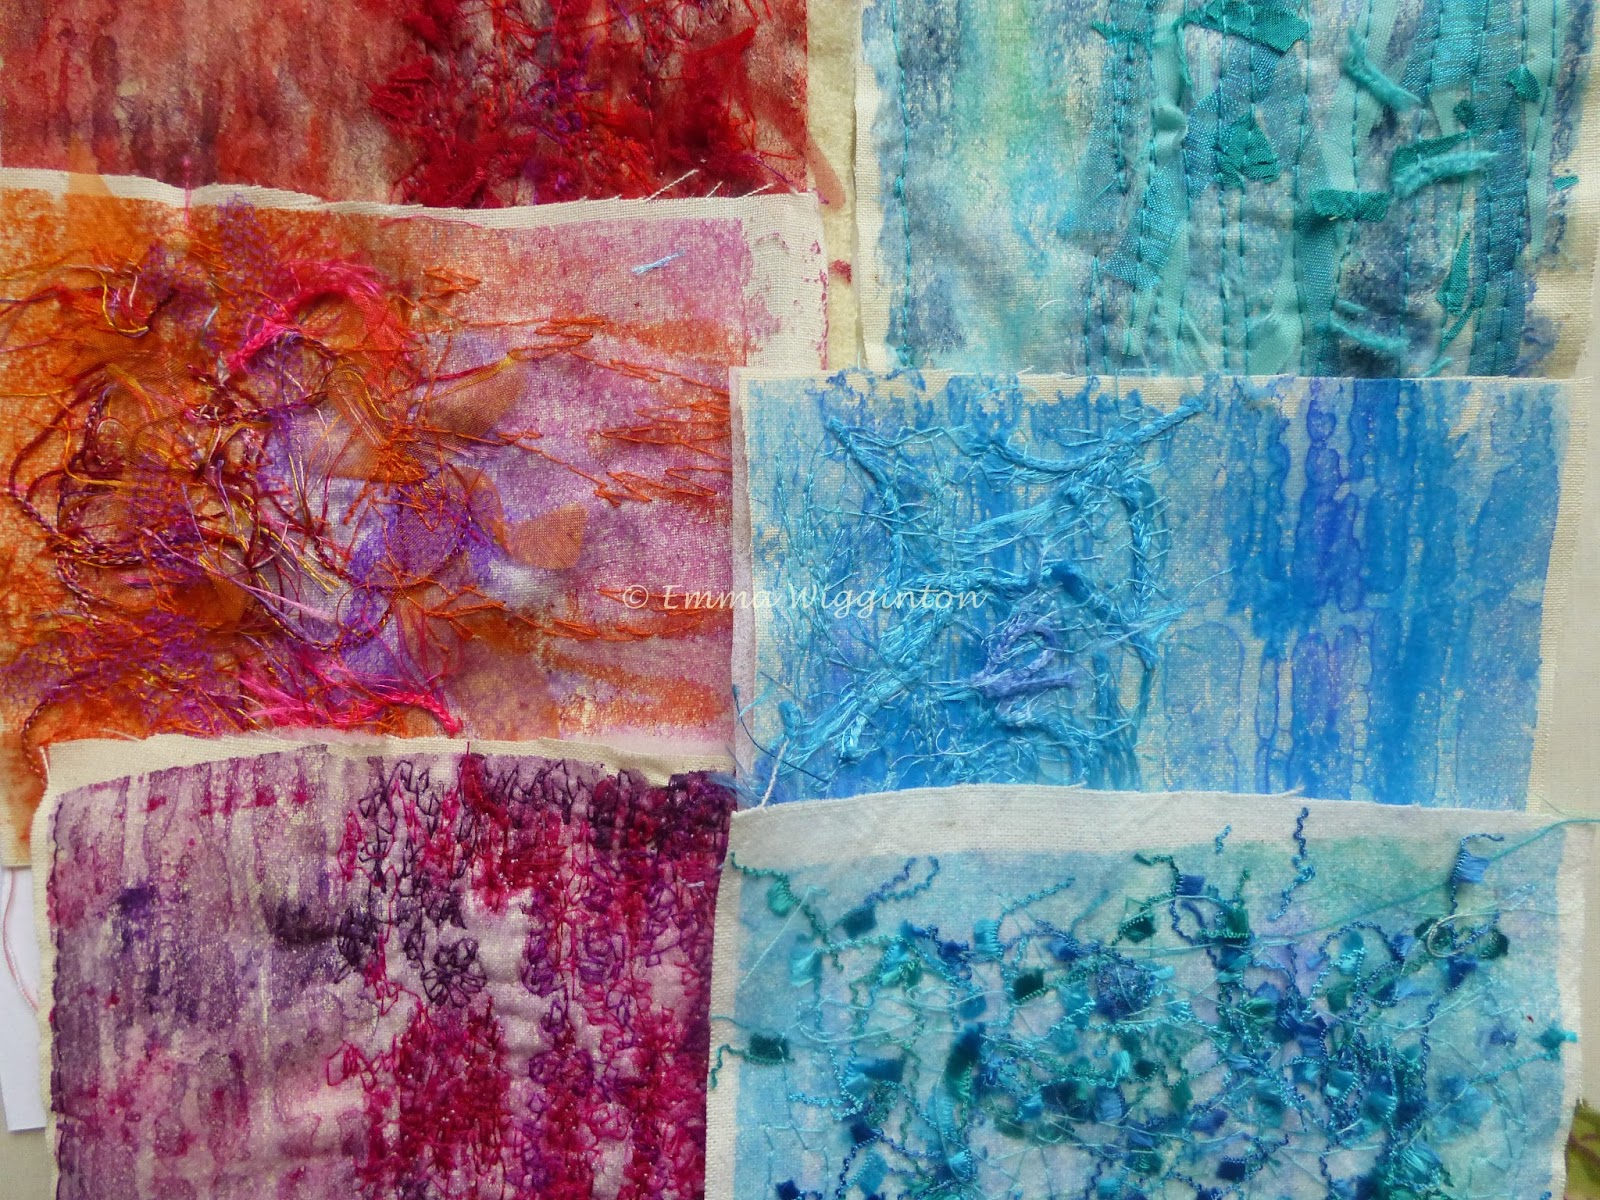
mmm...pleased with these!

and then there's that weird stuff, Tyvek, described by Barnyarns as a "spun bonded polythene fabric that is non-toxic and accepts colour mediums, will shrink, bubble and distort when heated"...not half we say! Mind you it's not so good at the health and safety owing to fumes, so you must heat it outdoors. I don't personally use it a lot...but it is amazing...

here is some which has been painted

then heated...


stitched with snippets of fabric then zapped...


painted then stitched, you can see the fabric shrinking has distorted the stitching

On the whole though I prefer to use more fabric and stitch based ways and challenge my process and creativity to achieve the textures I want...


but it may still include some bondaweb...here used OVER lots of fabric snippets, ironed on then stitched...


and bondaweb underneath...


and there may still be some heating...I used to do this with a household paint stripper, all my degree work was done with me hanging around outside the door of my studio 'burning' my beautiful work with this device!

you'll be pleased to know I do now have a more specialised controllable heat 'appliance'...

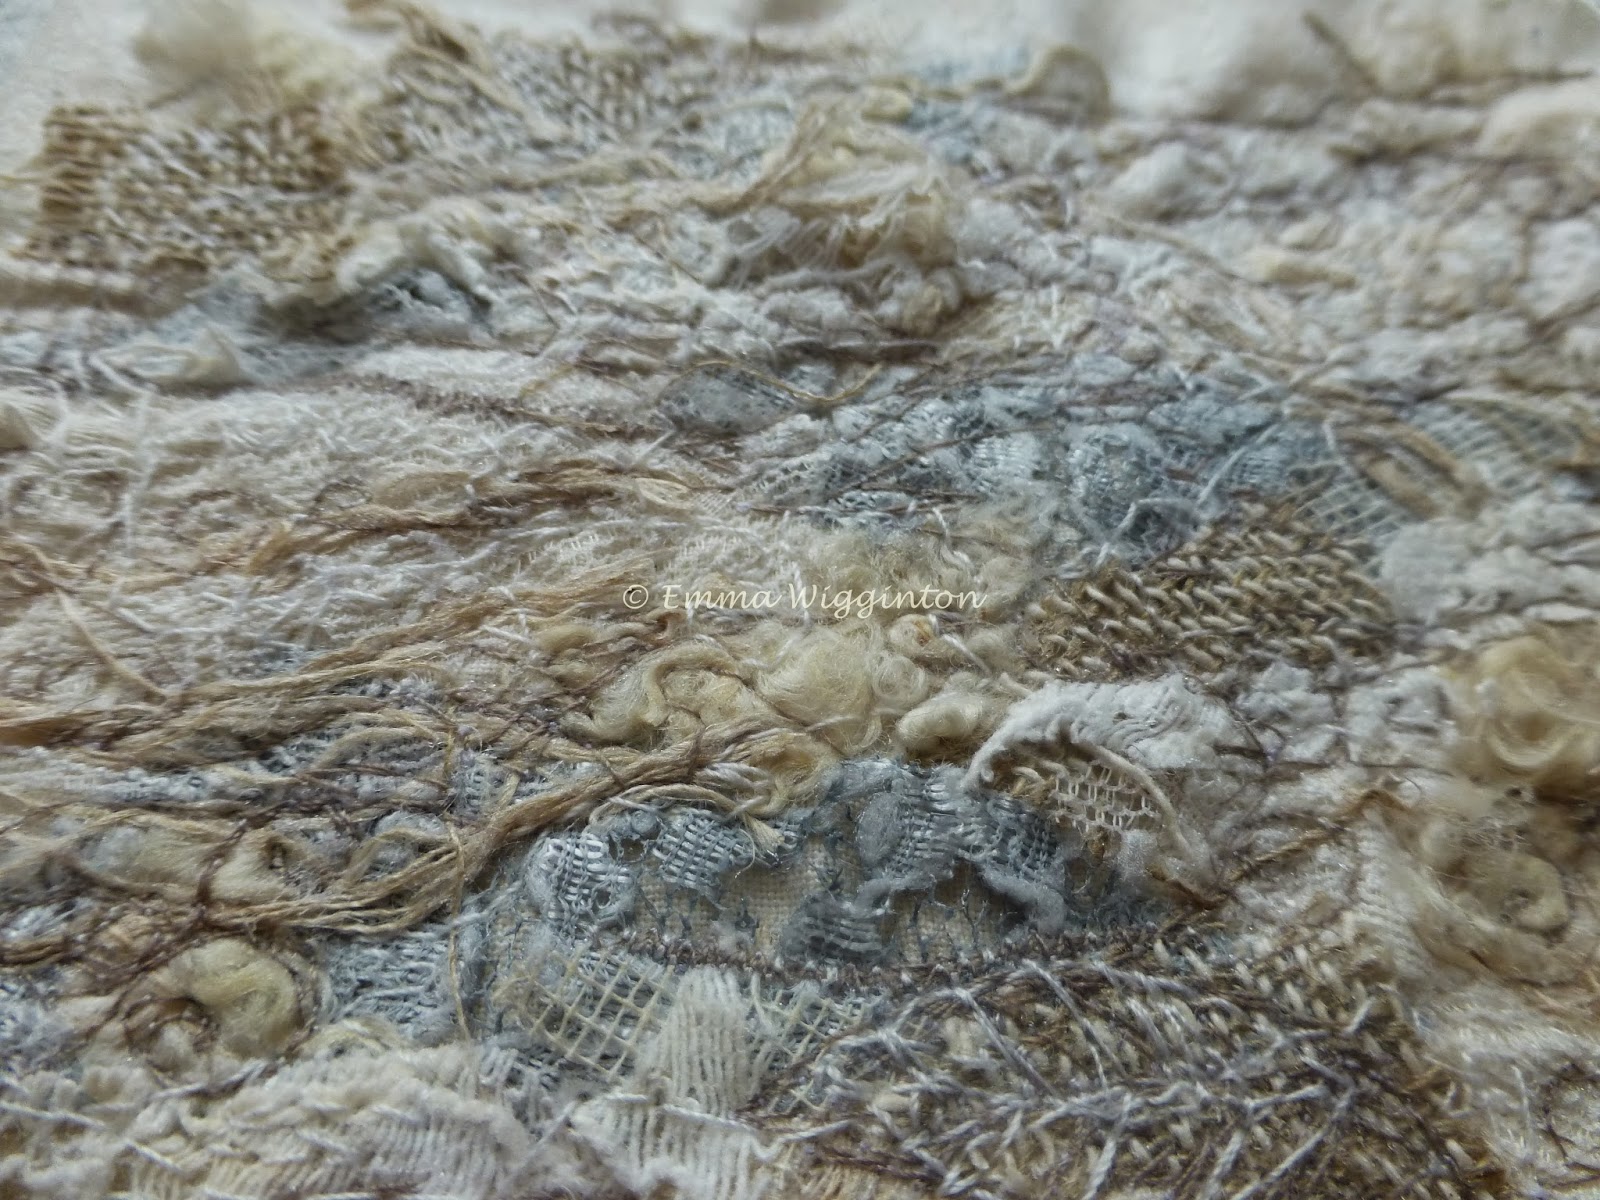
eg for burning away a top fabric to reveal layers underneath...I have to experiment first to see which fabrics will melt away...


or for small pieces of fabric stitched on top and then burned away...so much delicious colour too...


you can see why I need a housekeeper, cleaner, gardener and cook...because doing this is just so much more fun!
Hope you've enjoyed the workshop...and maybe been inspired to have a go...
Emmax 


Monday, 23 September 2013

feeling orange...

must be something in the air...autumn is hinting it's here...misty mornings when you can't see the hills, a sense of peace and calm after the heady summer days, quiet birdsong, flowers still colouring the garden...but seedheads and dry grasses filling up the hedgerows...change is afoot 

and C-art has been amazing again, 2 weekends done and one still to look forward to...been so great being with Ian and Steph in the studio once more...making art and conversation

and I've taught 2 lovely machine embroidery workshops too...can't beat a little bit of furniture moving in the middle of C-art!


Stephanie has been printing away...I love watching the process of her inking and mark making and playing with line and texture...


from all these bits and bobs somehow in Steph's hands... magic happens...


and in between talking to all the lovely people, drinking tea and eating cake... I have been able to play with fabrics, thread and stitch...and I am glad that textiles and machine embroidery is what I do cos it's much easier to clean up than paint!


happy? I should say so! 

hope you have a lovely week...maybe you're feeling orange too?? 

Emmaxx


Friday, 15 March 2013

Getting creative ...or how one thing leads to another...

it's a funny thing...creativity...sometimes I can plan what I am going to make and start off with fabrics and threads and start cutting out... and then I don't like the colours I thought I was going to use so the colour changes and I need to re-think or re-feel what goes with what...or I pick up a new piece of fabric or spot a little sample of something I made months ago or I look out the window and see new inspiration...and what I planned gradually creeps away from me and I am led in a new direction...

I am still not quite sure where this bag came from...
but I love it! 

I love the whole process...whether I am making an intricate piece of art with weeks and weeks of machine embroidery..or designing and sewing a lovely new bag or I have a 'must make it now' idea for a new corsage...I love it when it works... when I get a feeling of happiness and contented satisfaction... or giddy exitement and a 'dancing around the studio' joy when some combination of stitch and fabric or colour goes 'ting' in my head and I feel it is just right...

like when I started to make these rose brooches and now I can't stop...the simplicity of their design and the endless possible colour combinations is soo satisfying...


then when I photograph the things I have made and they enter a new dimension as they appear in beautiful colour on a computer screen...the digital revolution has brought such unimaginable ease of visual reproduction...and what I made in private become visible no longer only to me as I dare to share them with the world...
and hope the world likes them too...

and again I feel the pleasurable need to create so return to my studio to start afresh and the cycle goes on...

P.S.
I hope my Etsy shop will soon be stocking these goodies...just some uploading to do but first a weekend away with daughter mine on an athletic quest...hurdling in Manchester...have a great weekend xx


Sunday, 3 February 2013

how to make a bird brooch....

...or ten...

it is soo feeling a bit more springlike out in the world of nature...lighter nights...birds twittering more...little signs of bulbs and green shoots and buds..and of course snowdrops...aren't they incredible, coming up whatever the weather is doing...little signs of hope!


it's all made me feel more creative and much more like getting to my mahcine and getting sewing and embroidering...and using some gorgeous new fabrics such as this delicious daisy design and dotty spotty (can't beat a good spot!)in fab colours...feeling springlike and ready for fresh new shades...


so if you're feeling like joining me in some making...

first draw or trace your birdshape on paper..keep it simple...cut out a pattern and use to draw onto, or just pin onto, a piece of craft felt and cut out...(do try and use a wool type felt as they are just so much nicer to handle and sew with) Please note:I make a lot so I cut a lot! 

then for some tiny hearts..iron Bondaweb or similar to the back of your chosen fabric...and draw on your heart shape...note the nice sharp pencil...a miracle in this house to a) find a pencil, b) find a sharp pencil or c) find any pencil and a pencil sharpener within a mile of each other...

I then spend a relaxing time with Radio 4 or some nice music playing and cut out all my little hearts...bless them! Don't forget to take the PAPER backing off before you try to iron them on...


aren't they cute?

so with care iron on the heart to the bird shape...take care not to iron the felt as it won't like it!

next cut out a little beak in a different coulour of craft felt...and then pin the bird shapes and beaks to a bigger piece of felt...this make it soo much easier to sew (here I've used a piece of felted wool jumper) WARNING!! do not try to sew a small bird on it's own as it'll drive you nuts!


sew carefully round the bird shape close to the edge... make sure you include the beak...(not shown here cos I forgot!)


I then free machine round the heart but you can do it with a normal foot if you prefer...


and ta da..a row of little birds appears ...


it is a lovely moment when you cut them out and they become proper little birds...


just something missing...look away if you don't like operations as the next bit looks painful... but I'm sure they don't mind!


mm and they must look real as Basil is showing a great deal of interest...


or maybe it's just that it's cold out there and warm and snug in here...

To finish... sew a nice brooch pin onto the back and wear with pride at your craftyness...celebrate the handmade and welcome in the spring!

and talking of handmade...check out UK Handmade's magazine...bright new spring issue here

Have a great week...and I hope, fingers crossed, to be in opening Etsy mode soonest...I will keep you posted (I'm still doing photos and writing the blurb trying to make sure it's all perfect and looking lovely for you!)xx

PS and I'me feeling a Giveaway for spring coming on...